TortoiseBot Setup and Control Using ROS1 and ROS2
Assembling, Powering, and Running Software on the TortoiseBot
24 May 2024
Introduction
The TortoiseBot project focuses on the complete setup, assembly, and operation of the TortoiseBot using ROS1 Noetic and ROS2 Galactic. This project demonstrates the ability to follow detailed assembly instructions, procure necessary components, configure network settings, and control the robot using ROS frameworks. The project presented a valuable opportunity to build a robot from scratch, delving into both the electronics and mechanics side of robotics, complementing the programming skills extensively evidenced in other portfolio entries.
Objectives
- To successfully mount and power the TortoiseBot, including the acquisition and installation of required components.
- To connect the TortoiseBot to a Wi-Fi network and control it using ROS1 and ROS2 through a local computer.
Tools and Technologies
- Programming Languages: Python, Shell scripting
- Frameworks and Libraries: ROS1 Noetic, ROS2 Galactic
- Operating Systems: Raspbian Linux
- Hardware: TortoiseBot, Raspberry Pi, 12V Power Supply, Power Jack Adapters
- Network Tools: Fing app for network scanning
Source Code
Process and Development
The project is divided into two main parts: assembling the TortoiseBot and running software on it.
Part 1: Assembling the TortoiseBot
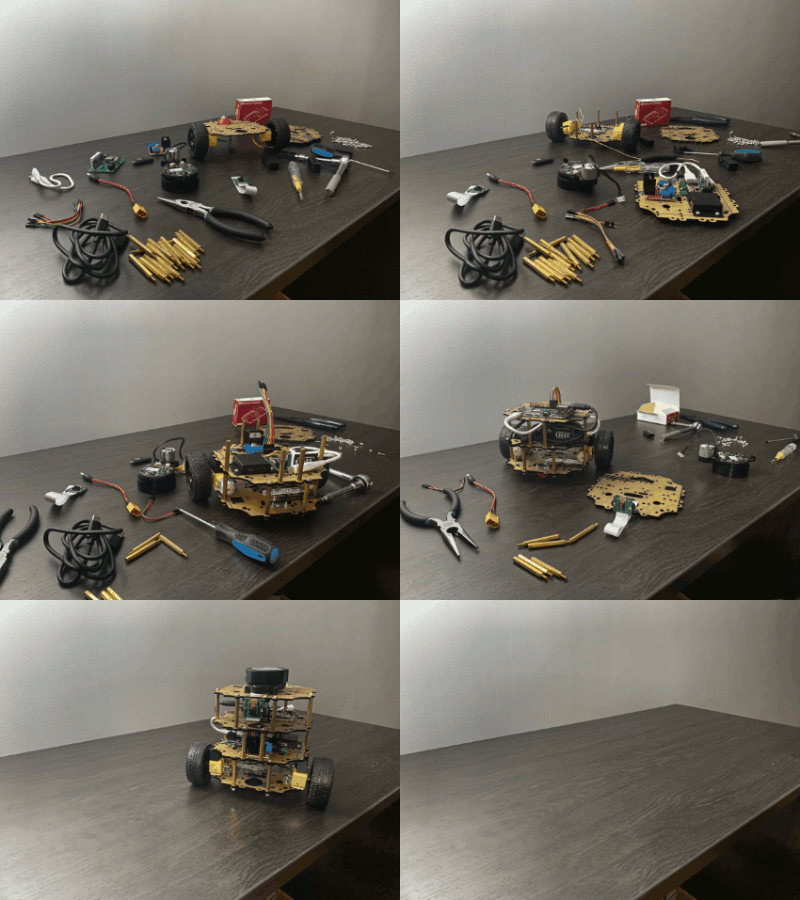
Initial Setup: The TortoiseBot requires assembly following the detailed instructions provided by Rigbetel Labs. This includes mounting the hardware components and integrating the power system.
Power Configuration: Instead of using a battery, a 12V power supply was used to power the TortoiseBot. The connection setup involved using jumper wires and power jack adapters to connect the power supply to the power board of the TortoiseBot. Once the connections were made, the robot was powered on successfully, with the battery indicator lighting up and the lidar starting to rotate.

Part 2: Running Software on TortoiseBot
Wi-Fi Configuration: The first step was to connect the TortoiseBot to the local Wi-Fi network. This involved editing configuration files on the SD card of the Raspberry Pi, such as wpa_supplicant.conf, to include the Wi-Fi SSID and password. The connectivity was verified using a network scanner app (Fing).
Connecting and Controlling the Robot: A direct SSH connection was established from a local computer to the TortoiseBot. This involved identifying the robot’s IP address on the network and using SSH to log in and launch the ROS drivers.
Testing and Verification: The control of the robot was verified by publishing velocity commands to the /cmd_vel topic and observing the robot’s movement. Additionally, RViz was used to visualize the robot’s sensors and TF data.

Results
The successful assembly and operation of the TortoiseBot demonstrated the ability to integrate hardware and software components, configure network settings, and control the robot using ROS1 and ROS2. This project showcases a comprehensive understanding of robotics systems and practical implementation skills, gained through an intensive course focusing on the programming aspects of robotics.
Key Insights
- The project’s success highlights the importance of following detailed instructions and configuring network settings correctly.
- Future enhancements could include automating the network configuration process and exploring advanced ROS2 capabilities for improved robot control.